To view details of a crew member's attachments:
1. From the HR Manager main menu, click Profiles under the Personnel menu.
2. Ensure that the crew profile of which you want to view attachment details has been loaded. Use the Personnel search field to search and select the relevant crew profile.
Note: To use a previously saved list of crew, click the search icon in the Personnel search field to use the Personnel List feature on the Simple Search window. Use the drop-down function to select and load a list from the Personnel List section and click a crew member from the Search Result section to view his profile.
![]()
3. After you have loaded the crew profile record, click the Attachments sub tab under the Documents tab.
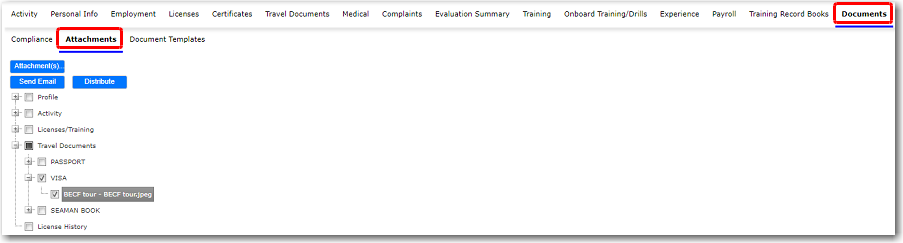
4. You can then expand the tree structure to view the attachments that have been uploaded to the crew member's records. Click the file name to download a copy of the document.
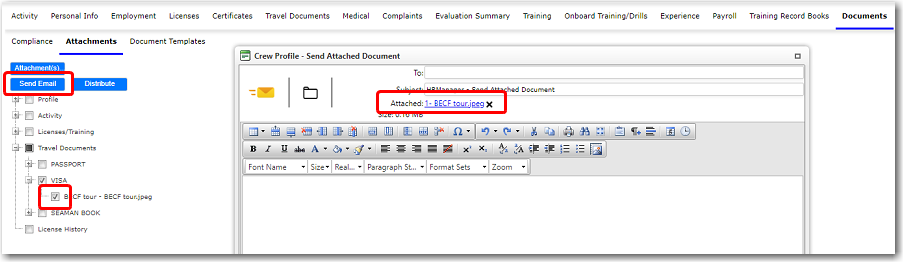
5. Select the document's check box and then click Send Email to automatically attach the selected document to an email.
6. Click the Attachment(s) button to manage the documents attached under the Profile section. The Upload Manager pop-up window will be displayed. Here you can attach more documents to the Profile section or delete previously attached documents.
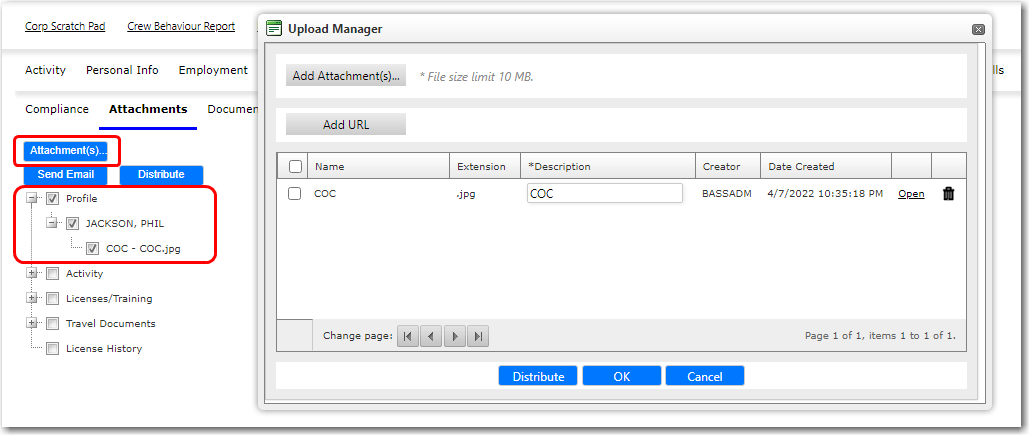
Note: To manage attachments that are displayed under the other sections, you will need to access the Attachment column on the respective screen and work with the attachments there; for example, the Attachment column on the Activity screen.
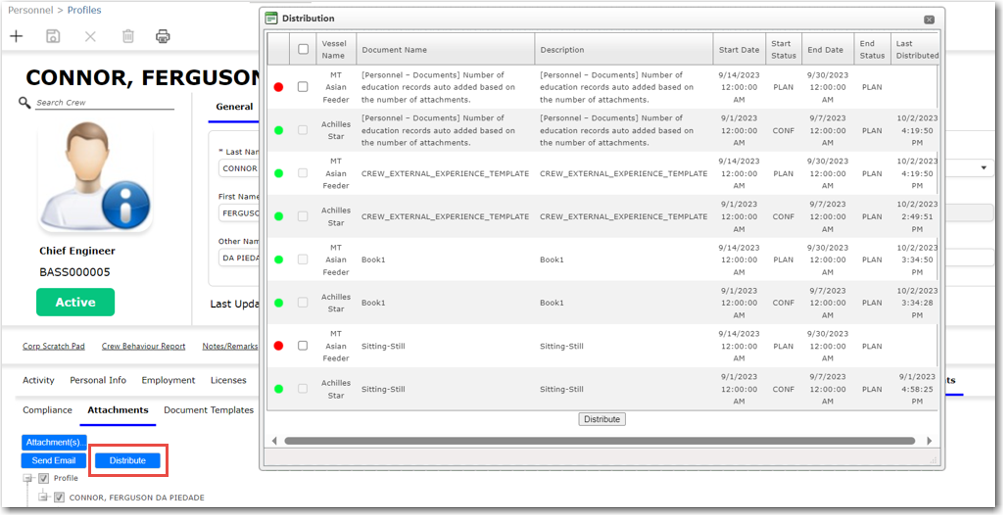
7. To distribute documents to other vessels, manually select the relevant documents and click the Distribute button. In the Distribution pop-up window, for each of the selected documents, select the documents that you want to distribute. Then click Distribute. The documents will then be replicated over to the selected vessels during the next replication exercise.
Note: A red status icon indicates that the document has not been replicated, while a green icon indicates that the replication is completed (determined by the Last Distributed date.