To
create new vessel particulars:
1. From the HR
Manager main menu, click Vessel
Particulars under the
Fleet menu.
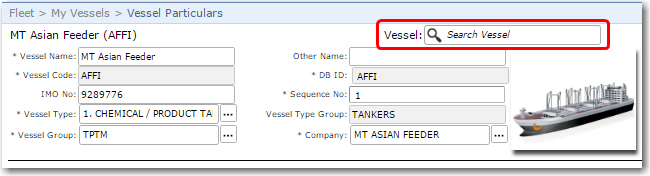
2. The Vessel
Particulars screen will
be displayed. Click New
to create a new Vessel record. Enter the main information of the
Vessel before moving on to the tabs:
Field |
Description |
Vessel
Name |
Enter
the name of the vessel. |
Other
Name |
Enter
the alternate name of the vessel, if applicable. |
Vessel
Code |
Enter
a code to represent this vessel. |
DB ID |
The
database ID of the Vessel in the System. |
IMO
No |
The
Vessel's IMO number. |
Sequence
No. |
Enter
the sequential positioning of this vessel in the Vessel
Listing. For example, entering '1' would put this vessel
at the top of the Vessel List. |
Vessel
Type |
Use
the Lookup function to select this vessel's type; for
example, 'Platform', 'Barge' and so on. |
Vessel
Type Group |
The
vessel type grouping will be automatically populated based
on the Vessel Type selected. |
Vessel
Group |
Use
the Lookup function to select the group under which this
vessel is to fall. |
Company |
Select
the vessel's company name. |
Note:
You can also mouse-over the image placeholder and click the Upload link to insert an image
for the vessel using the Upload
Manager. Vessel images uploaded in HR Manager will be synchronized
with the relevant vessel record in BASSnet Vessel Particulars.
3. Under the Owner
- Owner sub tab, specify
the following details:
Field |
Description |
Owner
Information |
The
Owner field is
a mandatory field. Use the Lookup function to make your
selection from the Owner
Company window that will be displayed. Once you
have made your selection, all the fields in this section
will be pre-filled with the selected Owner's information
that is stored in the Registers. |
Beneficiary
Information |
Use
the Lookup function at the Principal
Name field to make your selection from the Principal window that
will be displayed. Once you have made your selection,
all the fields in this section will be pre-filled with
the Principal's information stored in the Registers. |
4. Under the Owner
- Technical sub tab, the following fields are available:
Field |
Description |
Mgmt
Type |
This
is a mandatory field. Use the Lookup function to select
the type of management for this vessel. |
Technical
Mgmt Office |
This
is a mandatory field. Use the Lookup function to select
the technical management office of this vessel. |
General
section |
Specify
the vessel takeover details, such as the Estimated
Take Over date, the Actual
Take Over date, the Port
where it will take place and so on. |
Others
section |
Specify
the Union Due
(the Union-related amount
applicable for the ranks) and the Education/Welfare
benefits for the crew (if
this extra benefit is allocated to the crew). Then,
specify the period for these amounts in the From
and To fields.
You may also enter any additional Comments
if any. Information here is related to the Vessel takeover. |
5. Under the Owner
- Manning sub tab, the following fields are available:
Field |
Description |
Management
Office |
Use
the Lookup function to select the Management Office in
charge of this vessel. |
Personnel
Superintendant |
Use
the Lookup function to select the Personnel Superintendant.
Make your selection from the User window that will be
displayed. |
Send
Account To |
Indicate
where the accounts are to be sent after the takeover. |
Vessel
P-Fund No |
Enter
the Vessel's Provident Fund number. |
Employer
Reg. No |
Enter
the Employer's Registration number. |
Employer
P-Fund No |
Enter
the Employer's Provident Fund number. |
P&I
Club |
Use
the Lookup function to select the relevant P&I Club. |
Deductible |
Enter
the P&I deductible. |
General: |
S.E.C.
Cert. |
Number
of S.E.C certificates. |
Min.
Safe Manning |
The
number of complements recommended for the MSM. |
Accom.
Available |
Indicate
the number of accommodation space available on the vessel. |
Estimate
Take Over |
Enter
the estimated take-over date of the vessel. |
Actual
Take Over |
Enter
the actual date the takeover took place. Also, use the
Lookup function to select the Port
where the takeover took place. |
Left
Management |
Enter
the left management date (if applicable). Also, use the
Lookup function to select the Port
where it took place. |
Agreement
Date |
Use
the calendar function to select the date of the takeover
agreement. |
Signed
With |
Enter
the name of the company the agreement was signed with. |
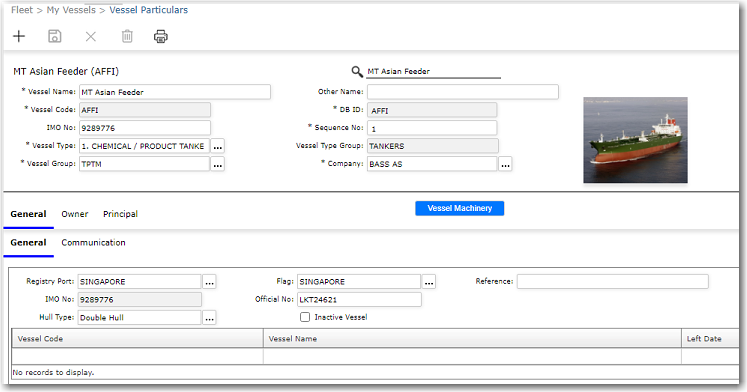
6. Under the General
tab, specify the following details:
Field |
Description |
General Tab: |
Registry
Port |
Use
the Lookup function to select the vessel's port of registry. |
Flag |
Use
the Lookup function to select the vessel's flag (country)
of registry. |
Reference |
Enter
the vessel's reference information. |
IMO
No |
The
IMO number of the vessel. |
Official
No |
The
official number of the vessel. |
Hull
Type |
Enter
the vessel's hull type. |
Inactive
Vessel |
Select
the check box to indicate that it is an inactive vessel. |
Communication
Tab |
Enter
details of all modes of communication with the vessel. |
7. Under the Principle
tab, the following fields are available:
Field |
Description |
Classification
Society |
Use
the Lookup function to select the Classification Society
under which this vessel falls. |
Hull
Under Writer |
Enter
the name of the Hull Underwriter for this vessel. |
General |
Enter
or select the vessel specifications for instance, the
Builder, Year Built, Length,
Breadth and so
on. |
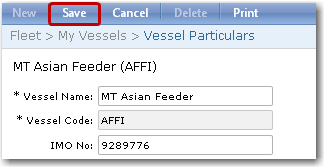
8. Click Save
at the top-right of the screen to save all the information you
have entered. You can now continue by adding the vessel's machinery
information.
9. Click the Vessel
Machinery button available on this screen. The Vessel
Machinery screen of the vessel created will be displayed.
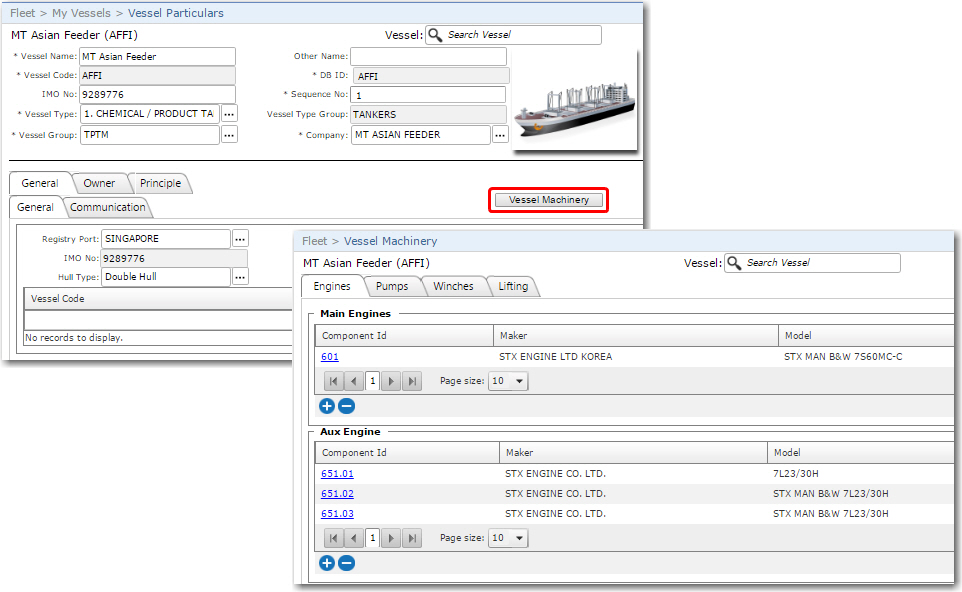
10. Under the Engines
tab, the following fields are available:
Field |
Description |
Main
Engines |
Click
the '+' icon to
enable data entry. Use the Lookup functions to select
the Maker and
Model of
the main engine. Then enter the engine's Serial No and
its Power (kW)
output.
Click Save to save your entries. |
Aux
Engine |
Click
the '+' icon to
enable data entry. Use the Lookup functions to select
the Maker and
Model of the aux
engine. Then enter the engine's Serial
No and its Power
(kW) output.
Click Save to save your entries. |
Emergency
Generator |
Use
the Lookup function to select the Maker
and Model of the
emergency generator. Then enter the generator's Serial No and its Power (kW) output.
Click Save to save your entries. |
11. Under the Pumps
tab, the following fields are available:
Field |
Description |
Cargo
Pumps |
Click
the '+' icon to
enable data entry. Use the Lookup functions to select
the Maker and
Model of the cargo
pump. Then enter the cargo pump's Serial
No and its Power
(kW) output.
Click Save to save your entries. |
Ballast
Pumps |
Click
the '+' icon to
enable data entry. Use the Lookup functions to select
the Maker and
Model of the ballast
pump. Then enter the ballast pump's Serial
No and its Power
(kW) output.
Click Save to save your entries. |
Other
Pumps |
Click
the '+' icon to
enable data entry. Use the Lookup functions to select
the Maker and
Model of the other
pump. Then enter the other pump's Serial
No and its Power
(kW) output.
Click Save to save your entries. |
12. Under the Winches
tab, the following fields are available:
Field |
Description |
Winches |
Click
the '+' icon to
enable data entry. Use the Lookup functions to select
the Maker and
Model of the winch.
Then enter the winch's Serial
No and its Power
(kW) output.
Click Save to save your entries. |
Windlass |
Click
the '+' icon to
enable data entry. Use the Lookup functions to select
the Maker and
Model of the windlass.
Then enter the windlass's Serial
No and its Power
(kW) output.
Click Save to save your entries. |
13. Under the Lifting
tab, the following fields are available:
Field |
Description |
| Cranes tab: |
Cranes |
Click
the '+' icon to
enable data entry. Use the Lookup functions to select
the Maker and
Model of the crane.
Then enter the crane's Serial
No.
Click Save to save your entries. |
Other
Cranes |
Click
the '+' icon to
enable data entry. Use the Lookup functions to select
the Maker and
Model of the other
crane. Then enter the other crane's Serial
No.
Click Save to save your entries. |
| Derricks tab: |
Derricks |
Click
the '+' icon to
enable data entry. Use the Lookup functions to select
the Maker and
Model of the derrick.
Then enter the derrick's Serial
No.
Click Save to save your entries. |
Other
Derricks |
Click
the '+' icon to
enable data entry. Use the Lookup functions to select
the Maker and
Model of the other
derrick. Then enter the other derrick's Serial
No.
Click Save to save your entries. |
|