Performing
Batch Entry of Payroll Data |
Using this feature you can enter
details of the payroll data in a batch mode. When you select a Vessel
or Personnel List etc, all crew members who fall under the selected grouping
for whom payroll data needs to be entered will be displayed. You can then
proceed to enter all the relevant details for all these crew members on
the same screen.
Note:
The difference between this feature and the Update
Payroll Data feature is that the Batch
Entry feature only displays one
main record for each crew member. For example, to add overtime
details for a crew member, you would need to add the combined overtime
information for the crew member as one entry. However in the Update
Payroll Data feature, if three overtime insertions have been made
to his record, then three records would be displayed for this crew member.
Note
on Wage Validity: A back-end System configuration is available
where, if the configuration is turned on, the System will check for any expired or invalid wages
in an Activity or an Account Period and prompt you if any were found.
The configuration can be set to either allow you to continue after the
prompt or stop you from proceeding until the expired/invalid wages have
been resolved. Please note that this feature is a back-end database-controlled
configurable feature. If you would like to explore the option of including
this feature, please contact BASS Support.
 Jump
to topic:
Performing
Batch Entry Payroll Data for OT Earn
Screen
Navigation: Payroll - Batch Entry Payroll
Data - OT Earn tab
To
perform a batch entry of payroll data for overtime earnings:
1. From the HR
Manager main menu, click Batch
Entry Payroll Data under the Payroll
menu.
2. The Batch
Entry Payroll Data screen is displayed. Use the search
field to carry out a search for crew members based on either Vessel, Personnel
List, Pool, Agent, Crew
or All (i.e. all crew
members based on the entered account period). Ensure that the
correct account
period has been entered and click Go.
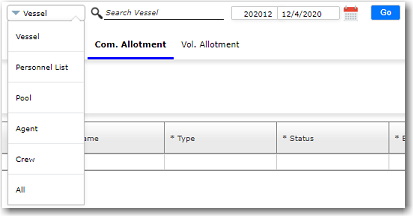
Note:
Click the search
icon in the search field to make your selection of Vessel, Personnel
List, Pool, Agent, Crew
or All (i.e. all crew
members based on the entered account period) from a list in the
relevant pop-up window.
3. The crew members based on your selection
will then be displayed on the screen. Under the OT
Earn tab, you can enter excess overtime/double bottom hours
worked by the relevant crew members in a batch mode.

4. Enter information in
the relevant columns OR click on the Crew
IPN record to enter more detailed information:
Field |
Description |
Crew
IPN |
The
crew number that is created by the System for the crew
member will be automatically displayed. |
Date |
The
date the crew member worked overtime. |
Type |
Select
the type of overtime, i.e. 'Excess OT' or 'Double Bottom'
(allowance for crew working on tankers with a double bottom).
|
Department |
Use
the Lookup function to select the department the crew
member falls under. |
Charge
To |
This
field gives you the option to charge the overtime to owners,
charterers or other cost centers. |
Dispute |
Select
this check box if there is any dispute regarding the overtime
hours worked.
Note:
A back-end configuration is available to hide/display
this check box. |
Post to Account
Period |
Use the Lookup
function to select a closed account period to which you
want to post this transaction. |
Hours |
Enter
the amount of overtime hours the crew member worked.
Note: The total excess
overtime hours cannot exceed 1500 hours. This is as per
the validation that has been set in the System. |
Rate |
Use
the Lookup function to select the overtime rate applicable
to the crew member. |
Rate Currency |
The rate
currency will be automatically displayed based on the
rate selected. |
Amount |
The
total amount payable based on the rate and hours worked
will be automatically calculated by the System. |
ROE |
The exchange
rate of the overtime earning currency against the base
currency. |
Amount |
The amount
in the base currency will be displayed based on the exchange
rate. |
Crew
ROE |
The exchange
rate of the overtime earning currency against the crew
currency. |
Amount |
The amount
in the crew currency will be displayed based on the crew
exchange rate. |
Comments |
Include
any comments, if any. |
Attachments
(Paper clip icon) |
Click in
this column to display the Upload
Manager pop-up window. Using this upload tool,
you can upload and attach relevant documents to this record,
for example, a soft-copy of the crew member's time sheet
etc.
You can also click the
Add
URL button to insert relevant or important links.
|
5. Click Save
to save your entries.
|
Performing
Batch Entry Payroll Data for Other Earning
Screen
Navigation: Payroll - Batch Entry Payroll Data - Other Earning
tab
To
perform a batch entry of payroll data for other earning:
1.
From the HR
Manager main menu, click
Batch Entry Payroll
Data under the Payroll menu.
2. The Batch
Entry Payroll Data screen is displayed. Use the search
field to carry out a search for crew members based on either Vessel, Personnel
List, Pool, Agent, Crew
or All (i.e. all crew
members based on the entered account period). Ensure that the
correct account
period has been entered and click Go.

Note:
Click the search
icon in the search field to make your selection of Vessel, Personnel
List, Pool, Agent, Crew
or All (i.e. all crew
members based on the entered account period) from a list in the
relevant pop-up window.
3. The crew members based on your selection
will then be displayed on the screen. Under the Other
Earning tab, you can add all earnings which are outside
the crew members' regular incomes or expenses incurred in a batch
mode.
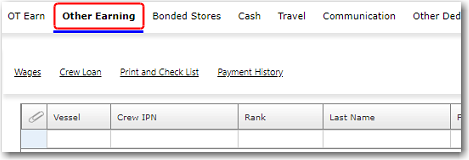
4. Enter information in
the relevant columns OR click on the Crew
IPN record to enter more detailed information:
Field |
Description |
Crew
IPN |
The
crew number that is created by the System for the crew
member will be automatically displayed. |
Date |
The
date that this other earning occurred. |
Cost
Element |
Use
the Lookup function to select the cost element of the
other earning. |
Department |
Use
the Lookup function to select the department that the
crew member falls under. |
Charge
To |
This
field gives you the option to charge the amount to owners,
charterers or other cost centers. |
Cash |
Select
this check box if the other earning was paid off in cash.
Other earnings transactions carried out in cash will not
be displayed in the Payroll
Summary. |
Status |
Select the
status of this other earning record. |
Dispute |
Select
the check box if there is any dispute regarding the payable
amount.
Note:
A back-end configuration is available to hide/display
this check box. |
Post to Account
Period |
Use the Lookup
function to select a closed account period to which you
want to post this transaction. |
Beneficiary
Name |
Use
the Lookup function to select the crew member's beneficiary,
if this amount is to be sent to the beneficiary. For instance,
if the crew member is being paid off via his beneficiary. |
Pay
From |
The
start date of a special holiday bonus calculation will
be automatically displayed, as selected on the Special
Holiday Bonus screen. |
Pay
To |
The
end date for a special holiday bonus calculation will
be automatically displayed, as selected on the Special
Holiday Bonus screen. |
Currency |
Enter
the currency of the other earning. |
Amount |
Enter
the amount of the other earning. |
ROE |
The
exchange rate of the other earning currency against the
base currency. |
Amount |
The
amount in the base currency will be displayed based on
the exchange rate. |
Crew
Currency |
The
crew currency of the other earning. |
Crew ROE |
The exchange
rate of the other earning currency against the crew currency. |
Amount |
The amount
in the crew currency will be displayed based on the crew
exchange rate. |
Comments |
Include
comments, if any. |
Attachments
(Paper clip icon) |
Click in
this column to display the Upload
Manager pop-up window. Using this upload tool,
you can upload and attach relevant documents to this record,
for example, a soft-copy of the crew member's time sheet
etc.
You
can also click the Add
URL button to insert relevant or important links.
|
5. Click Save
to save your entries.
|
Performing
Batch Entry Payroll Data for Bonded Stores
Screen
Navigation: Payroll - Batch Entry Payroll Data - Bonded Stores
tab
To
perform a batch entry of payroll data for bonded stores:
1.
From the HR
Manager main menu, click
Batch Entry Payroll
Data under the Payroll menu.
2. The Batch
Entry Payroll Data screen is displayed. Use the search
field to carry out a search for crew members based on either Vessel, Personnel
List, Pool, Agent, Crew
or All (i.e. all crew
members based on the entered account period). Ensure that the
correct account
period has been entered and click Go.

Note:
Click the search
icon in the search field to make your selection of Vessel, Personnel
List, Pool, Agent, Crew
or All (i.e. all crew
members based on the entered account period) from a list in the
relevant pop-up window.
3. The crew members based on your selection
will then be displayed on the screen. Under the Bonded
Stores tab, you can enter details of items taken by the
crew members from the ship store i.e. bonded stores items in a
batch mode.
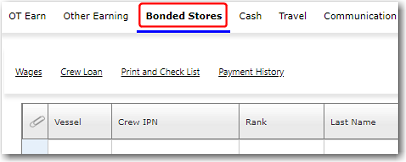
4. Enter information in
the relevant columns OR click on the Crew
IPN record to enter more detailed information:
Field |
Description |
Crew
IPN |
The
crew number that is created by the System for the crew
member will be automatically displayed. |
Date |
The
date the bonded stores transaction was carried out. |
Material |
Use
the Lookup function to select the item that was taken
from the store. Make your selection from the Bonded
Stores pop-up window that is displayed. |
Description |
The
description of the item will be automatically populated
upon bonded stores selection in the Material
field. |
Material
Quantity |
Enter
the quantity of the item taken. |
Material
Price |
The
price of an item will be automatically populated based
on the selection in the Material
field. |
Cash |
Select
this check box to indicate that the transaction was carried
out in cash.
Note:
Cash sales of bonded stores items are shown in the Ship's
Account whereas non-cash sales are shown as deductions
in the Payroll Summary. |
Dispute |
Select
this check box if there is any dispute regarding this
transaction.
Note:
A back-end configuration is available to hide/display
this check box. |
Currency |
Use
the Lookup function to select the currency of the transaction. |
Amount |
The
total cost of the item taken from the store will be automatically
calculated based on entries in the Material
Quantity and Material
Price fields. |
ROE |
Enter
the exchange rate of the transaction currency against
the base currency. |
Amount |
The
amount in the base currency will be displayed based on
the exchange rate. |
Crew Currency |
The crew
currency of the transaction. |
Crew ROE |
The exchange
rate of the transaction currency against the crew currency. |
Amount |
The amount
in the crew currency will be displayed based on the crew
exchange rate. |
Post to Account
Period |
Use the Lookup
function to select a closed account period to which you
want to post this transaction. |
Comments |
Include
any comments, if any. |
Attachments
(Paper clip icon) |
Click in
this column to display the Upload
Manager pop-up window. Using this upload tool,
you can upload and attach relevant documents to this record,
for example, a soft-copy of the crew member's time sheet
etc.
You can also click the
Add
URL button to insert relevant or important links.
|
5. Click Save
to save your entries.
|
Performing
Batch Entry Payroll Data for Cash
Screen Navigation: Payroll
- Batch Entry Payroll Data - Cash tab
To
perform a batch entry of payroll data for cash:
1.
From the HR
Manager main menu, click
Batch Entry Payroll
Data under the Payroll menu.
2. The Batch
Entry Payroll Data screen is displayed. Use the search
field to carry out a search for crew members based on either Vessel, Personnel
List, Pool, Agent, Crew
or All (i.e. all crew
members based on the entered account period). Ensure that the
correct account
period has been entered and click Go.

Note:
Click the search
icon in the search field to make your selection of Vessel, Personnel
List, Pool, Agent, Crew
or All (i.e. all crew
members based on the entered account period) from a list in the
relevant pop-up window.
3. The crew members based on your selection
will then be displayed on the screen. Under the Cash
tab, you can enter details of cash advances taken by the crew
members for the purposes of making deductions from their wages
or to indicate that the crew members were paid off in cash upon
sign off.
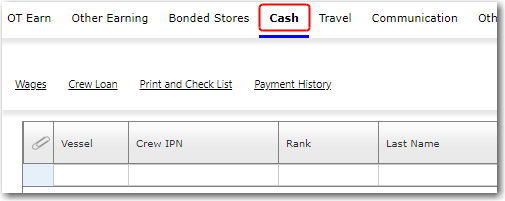
4. Enter information in
the relevant columns OR click on the Crew
IPN record to enter more detailed information:
Field |
Description |
Crew
IPN |
The
crew number that is created by the System for the crew
member will be automatically displayed. |
Date |
The
date the cash advance was given to the crew member. |
Pay
Off |
Select
this check box to indicate that the crew member's wage
is being paid off in cash upon sign off. |
Cost
Element |
Use
the Lookup function to select the cost element for which
this cash was given. For example, a license expense. |
Source |
The
source of the cash, for instance, 'Master', 'Office' or
'Port Agent'. |
Port |
If
'Port Agent' was selected in the Source
field, then specify the port where the cash was received
by the crew member. |
Port
Agent |
If
a port was selected in the Port
field, then specify the port agent from whom
the cash was received by the crew member. |
Office |
If
'Office' was selected in the Source
field, then specify the office from which the cash was
received by the crew member. |
Dispute |
Select
this check box if there is any dispute regarding this
transaction.
Note:
A back-end configuration is available to hide/display
this check box. |
Cheque
No. |
Enter
the cheque number of the amount given to the crew member. |
Currency |
Use
the Lookup function to select the currency in which the
cash was given. |
Amount |
Enter
the amount of the cash given to the crew member. |
ROE |
Enter
the exchange rate of the cash amount currency against
the base currency. |
Amount |
The
amount in the base currency will be displayed based on
the exchange rate. |
Crew Currency |
The crew
currency of the cash. |
Crew ROE |
The exchange
rate of the cash amount currency against the crew currency. |
Amount |
The amount
in the crew currency will be displayed based on the crew
exchange rate. |
Post to Account
Period |
Use the Lookup
function to select a closed account period to which you
want to post this transaction. |
Comments |
Include
any comments, if any. |
Attachments
(Paper clip icon) |
Click in
this column to display the Upload
Manager pop-up window. Using this upload tool,
you can upload and attach relevant documents to this record,
for example, a soft-copy of the crew member's time sheet
etc.
You
can also click the Add
URL button to insert relevant or important links.
|
5. Click Save
to save your entries.
|
Performing
Batch Entry Payroll Data for Travel
Screen Navigation: Payroll
- Batch Entry Payroll Data - Travel tab
To
perform a batch entry of payroll data for travel:
1.
From the HR
Manager main menu, click
Batch Entry Payroll
Data under the Payroll menu.
2. The Batch
Entry Payroll Data screen is displayed. Use the search
field to carry out a search for crew members based on either Vessel, Personnel
List, Pool, Agent, Crew
or All (i.e. all crew
members based on the entered account period). Ensure that the
correct account
period has been entered and click Go.

Note:
Click the search
icon in the search field to make your selection of Vessel, Personnel
List, Pool, Agent, Crew
or All (i.e. all crew
members based on the entered account period) from a list in the
relevant pop-up window.
3. The crew members based on your selection
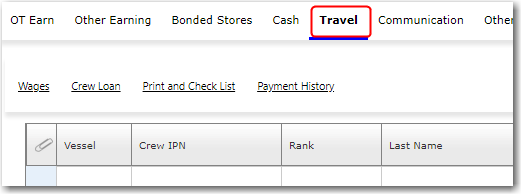
will then be displayed on the screen. Under the Travel
tab, you can enter travel costs for the crew members and their
dependents, which are recoverable by the company in a batch mode.
4. Enter information in
the relevant columns OR click on the Crew
IPN record to enter more detailed information:
Field |
Description |
Crew
IPN |
The
crew number that is created by the System for the crew
member will be automatically displayed. |
Date |
The
date of the travel. |
Dispute |
Select
this check box if there is any dispute regarding this
transaction.
Note:
A back-end configuration is available to hide/display
this check box. |
Post to Account
Period |
Use the Lookup
function to select a closed account period to which you
want to post this transaction. |
Currency |
Use
the Lookup function to select the currency in which the
travel cost was paid. |
Amount |
Enter
the amount incurred by the company for the travel. |
ROE |
Enter
the exchange rate of the travel cost currency against
the base currency. |
Amount |
The
amount in the base currency will be displayed based on
the exchange rate. |
Crew Currency |
The crew
currency of the travel cost. |
Crew ROE |
The exchange
rate of the currency of the travel cost against the crew
currency. |
Amount |
The amount
in the crew currency will be displayed based on the crew
exchange rate. |
Comments |
Include
any comments, if any. |
Attachments
(Paper clip icon) |
Click in
this column to display the Upload
Manager pop-up window. Using this upload tool,
you can upload and attach relevant documents to this record,
for example, a soft-copy of the crew member's time sheet
etc.
You
can also click the Add
URL button to insert relevant or important links.
|
5. Click Save
to save your entries.
|
Performing
Batch Entry Payroll Data for Communication
Screen Navigation: Payroll
- Batch Entry Payroll Data - Communication tab
To
perform a batch entry of payroll data for communication:
1.
From the HR
Manager main menu, click
Batch Entry Payroll
Data under the Payroll menu.
2. The Batch
Entry Payroll Data screen is displayed. Use the search
field to carry out a search for crew members based on either Vessel, Personnel
List, Pool, Agent, Crew
or All (i.e. all crew
members based on the entered account period). Ensure that the
correct account
period has been entered and click Go.

Note:
Click the search
icon in the search field to make your selection of Vessel, Personnel
List, Pool, Agent, Crew
or All (i.e. all crew
members based on the entered account period) from a list in the
relevant pop-up window.
3. The crew members based on your selection
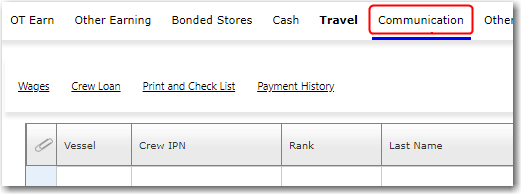
will then be displayed on the screen. Under the Communication
tab, you can enter the communication costs incurred by the company
for the crew members' use of e-mail, telex and telephone services
in a batch mode.
4. Enter
information in the relevant columns OR click on the Crew IPN record to enter more detailed information:
Field |
Description |
Crew
IPN |
The
crew number that is created by the System for the crew
member will be automatically displayed. |
Date |
The
date the communication service was used by the crew member. |
Cash |
Select
this check box if the transaction was carried out in cash. |
Communication
Type |
Use
the Lookup function to select the type of communication
service that was used by the crew member. |
Dispute |
Select
this check box if there is any dispute regarding this
transaction.
Note:
A back-end configuration is available to hide/display
this check box. |
Post to Account
Period |
Use the Lookup
function to select a closed account period to which you
want to post this transaction. |
Currency |
Use
the Lookup function to select the currency in which the
communication service charge was incurred. |
Amount |
Enter
the amount incurred for the use of the communication service. |
ROE |
Enter
the exchange rate of the communication cost currency against
the base currency. |
Amount |
The
amount in the base currency will be displayed based on
the exchange rate. |
Crew Currency |
The crew
currency of the communication cost. |
Crew ROE |
The exchange
rate of the communication cost currency against the crew
currency. |
Amount |
The amount
in the crew currency will be displayed based on the crew
exchange rate. |
Comments |
Include
any comments, if any. |
Attachments
(Paper clip icon) |
Click in
this column to display the Upload
Manager pop-up window. Using this upload tool,
you can upload and attach relevant documents to this record,
for example, a soft-copy of the crew member's time sheet
etc.
You
can also click the Add
URL button to insert relevant or important links.
|
5. Click Save
to save your entries.
|
Performing Batch Entry Payroll Data for Other Deduction
Screen Navigation: Payroll
- Batch Entry Payroll Data - Other Deduction tab
To
perform a batch entry of payroll data for other deduction:
1.
From the HR
Manager main menu, click
Batch Entry Payroll
Data under the Payroll menu.
2. The Batch
Entry Payroll Data screen is displayed. Use the search
field to carry out a search for crew members based on either Vessel, Personnel
List, Pool, Agent, Crew
or All (i.e. all crew
members based on the entered account period). Ensure that the
correct account
period has been entered and click Go.

Note:
Click the search
icon in the search field to make your selection of Vessel, Personnel
List, Pool, Agent, Crew
or All (i.e. all crew
members based on the entered account period) from a list in the
relevant pop-up window.
3. The crew members based on your selection
will then be displayed on the screen. Under the Other
Deduction tab, you can enter any other miscellaneous crew
wage deductions that do not fall under any of the previous tabs
in a batch mode.

4. Enter information in
the relevant columns OR click on the Crew
IPN record to enter more detailed information:
Field |
Description |
Crew
IPN |
The
crew number that is created by the System for the crew
member will be automatically displayed. |
Date |
The
date the expense was incurred by the company. |
Cost
Element |
Use
the Lookup function to select the cost element for this
expense. |
Cash |
Select
this check box to indicate a cash payment to the crew
member or his beneficiary (i.e. the selection made in
the Beneficiary Name
field). |
Status |
Select
the status of this record. |
Dispute |
Select
this check box if there is any dispute regarding this
transaction.
Note:
A back-end configuration is available to hide/display
this check box. |
Post to Account
Period |
Use the Lookup
function to select a closed account period to which you
want to post this transaction. |
Beneficiary
Name |
Use
the Lookup function to select the crew member's beneficiary
if you are using this Other Deductions feature to pay
off a crew member's wages by paying the wages directly
to the beneficiary. Use this in combination with the Cash check box. |
Currency |
Use
the Lookup function to select the currency in which the
charge was incurred. |
Amount |
Enter
the total amount incurred. |
ROE |
Enter
the exchange rate of the expense currency against the
base currency. |
Amount |
The
amount in the base currency will be displayed based on
the exchange rate. |
Crew Currency |
The crew
currency of the expenses. |
Crew ROE |
The exchange
rate of the expense currency against the crew currency. |
Amount |
The amount
in the crew currency will be displayed based on the crew
exchange rate. |
Post to Account
Period |
Use the Lookup
function to select a closed account period to which you
want to post this transaction. |
Comments |
Include
any comments, if any. |
Attachments
(Paper clip icon) |
Click in
this column to display the Upload
Manager pop-up window. Using this upload tool,
you can upload and attach relevant documents to this record,
for example, a soft-copy of the crew member's time sheet
etc.
You
can also click the Add
URL button to insert relevant or important links.
|
5. Click Save
to save your entries.
|
Performing Batch Entry Payroll Data for Compulsory Allotment
Screen Navigation: Payroll
- Batch Entry Payroll Data - Compulsory Allotment tab
To
perform a batch entry of payroll data for compulsory allotment:
1.
From the HR
Manager main menu, click
Batch Entry Payroll
Data under the Payroll menu.
2. The Batch
Entry Payroll Data screen is displayed. Use the search
field to carry out a search for crew members based on either Vessel, Personnel
List, Pool, Agent, Crew
or All (i.e. all crew
members based on the entered account period). Ensure that the
correct account
period has been entered and click Go.

Note:
Click the search
icon in the search field to make your selection of Vessel, Personnel
List, Pool, Agent, Crew
or All (i.e. all crew
members based on the entered account period) from a list in the
relevant pop-up window.
3. The crew members based on your selection
will then be displayed on the screen. Under the Com.
Allotment tab, you can enter compulsory allotment details
for the crew members in a batch mode.
4. Enter information in
the relevant columns OR click on the Crew
IPN record to enter more detailed information:
Field |
Description |
Allotment
Detail tab: |
Crew
IPN |
The
crew number that is created by the System for the crew
member will be automatically displayed. |
Date |
The
allotment date. |
Beneficiary
Name |
Use
the Lookup function to select the beneficiary for this
allotment. The beneficiaries listed for selection are
retrieved from this crew's profile record. Upon selection
of the beneficiary, all allotment details entered in this
crew member's profile record will be populated here. You
can edit these details as required or add missing details.
Note:
The beneficiary will only be available for selection if,
in the crew profile record, you have selected the beneficiary
to receive a compulsory or voluntary allotment and this
record must carry an 'Approved' status. |
Allot.
Type |
Select
the compulsory allotment type using the available drop-down menu. |
Beneficiary
Bank Code |
Displays
the bank code used by the beneficiary in the allotment. |
Beneficiary
Swift Code |
Displays
the swift code used by the beneficiary in the allotment. |
Account
No. |
The
beneficiary's account number will be automatically populated
by the System based on the beneficiary selected. |
Status |
Use
the drop-down menu to select the status of this allotment.
This is where you can approve or cancel an allotment.
Note:
The ability to change the status of an allotment request
would depend on the user's access rights. |
Payment
Mode |
Select
the mode of payment of this allotment. |
Cost
Element Pay Off |
Use
the Lookup function to select the cost element for this
allotment, if applicable. |
Post to Account
Period |
Use the Lookup
function to select a closed account period to which you
want to post this allotment. |
Fixed
On |
Select
whether the payment is to be fixed on crew currency or
payout currency. |
Currency |
Use
the Lookup function to select the currency in which the
allotment is to be made. |
Amount |
The
allotment amount that is to be deducted from the crew
member's wages. |
ROE |
The
exchange rate for conversion into base currency. |
Amount |
The
amount in base currency will be automatically displayed
based on the exchange rate. |
Crew Currency |
The crew
currency of the allotment. |
Crew
ROE |
The
exchange rate of the crew currency as against the base
currency. |
Crew
Amount |
The amount
in the crew currency will be displayed based on the crew
exchange rate. |
Payment
Method |
Select
the method of payment of the allotment. |
Comments |
Include
any comments, if any. |
Bank
tab: The bank details will be automatically
retrieved from the crew's profile record. You can edit
these details as required. |
Miscellaneous
tab: Here you can track payment dates and even
the cheque number of the payment. |
Auto
Deduction |
If
an auto
deduction allotment is made, then the figure that
was automatically deducted for the crew member will be
displayed in this field. You can click the Lookup function
to view the Auto Deduction
Details. |
Manual
Deduction |
If
a manual
deduction for allotments was made, you can click
the Lookup function in this field to view the Manual
Deduction Details. |
Batch
ID |
The
batch ID that this allotment belongs to. |
Payment
Date |
Use
the calendar function to select the date the payment was
made. |
Cheque
No. |
Enter
the cheque number of the payment. |
AL
Posting Date |
Use
the calendar function to select the date this transaction
was posted to accounts in the Accounting System. |
Wage
Deduct Month |
Enter
the month the wage was deducted for this allotment. |
History
Transaction |
Click
this button to view the transaction history of allotments
made. You may then select a particular record and click
Import Allotment
to overwrite a current record, if required. |
Attachments
(Paper clip icon) |
Click in
this column to display the Upload
Manager pop-up window. Using this upload tool,
you can upload and attach relevant documents to this record,
for example, a soft-copy of the crew member's time sheet
etc.
You
can also click the Add
URL button to insert relevant or important links.
|
5. Click Save
to save your entries.
|
Performing Batch Entry Payroll Data for Voluntary Allotment
Screen Navigation: Payroll
- Batch Entry Payroll Data - Voluntary Allotment tab
To
perform a batch entry of payroll data for voluntary allotment:
1.
From the HR
Manager main menu, click
Batch Entry Payroll
Data under the Payroll menu.
2. The Batch
Entry Payroll Data screen is displayed. Use the search
field to carry out a search for crew members based on either Vessel, Personnel
List, Pool, Agent, Crew
or All (i.e. all crew
members based on the entered account period). Ensure that the
correct account
period has been entered and click Go.

Note:
Click the search
icon in the search field to make your selection of Vessel, Personnel
List, Pool, Agent, Crew
or All (i.e. all crew
members based on the entered account period) from a list in the
relevant pop-up window.
3. The crew members based on your selection
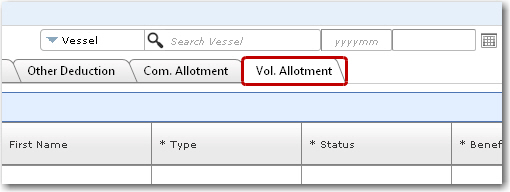
will then be displayed on the screen. Under the Vol.
Allotment tab, you can enter voluntary allotment details
for the crew members in a batch mode.
4. Enter information in
the relevant columns OR click on the Crew
IPN record to enter more detailed information:
Field |
Description |
Allotment
Detail tab: |
Crew
IPN |
The
crew number that is created by the System for the crew
member will be automatically displayed. |
Date |
The
allotment date. |
Beneficiary
Name |
Use
the Lookup function to select the beneficiary for this
allotment. The beneficiaries listed for selection are
retrieved from this crew's profile record. Upon selection
of the beneficiary, all allotment details entered in this
crew member's profile record will be populated here. You
can edit these details as required or add missing details.
Note:
The beneficiary will only be available for selection if,
in the crew profile record, you have selected the beneficiary
to receive a compulsory or voluntary allotment and this
record must carry an 'Approved' status. |
Allot.
Type |
Select
the voluntary allotment type using the available drop-down menu. |
Beneficiary
Bank Code |
Displays
the bank code used by the beneficiary in the allotment. |
Beneficiary
Swift Code |
Displays
the swift code used by the beneficiary in the allotment. |
Account
No. |
The
beneficiary's account number will be automatically populated
by the System based on the beneficiary selected. |
Status |
Use
the drop-down menu to select the status of this allotment.
This is where you can approve or cancel an allotment.
Note:
The ability to change the status of an allotment request
would depend on the user's access rights. |
Payment
Mode |
Select
the mode of payment of this allotment. |
Cost
Element Pay Off |
The
cost element for this allotment, if applicable. |
Loan
Ref ID |
Use
the Lookup function to select the relevant loan reference
ID. |
Post to Account
Period |
Use the Lookup
function to select a closed account period to which you
want to post this allotment. |
Fixed
On |
Select
whether the payment is to be fixed on crew currency or
payout currency. |
Currency |
Use
the Lookup function to select the currency in which the
allotment is to be made. |
Amount |
The
allotment amount that is to be deducted from the crew
member's wages. |
ROE |
The
exchange rate for conversion into base currency. |
Amount |
The
amount in base currency will be automatically displayed
based on the exchange rate entered. |
Crew Currency |
The crew
currency of the allotment. |
Crew
ROE |
The
exchange rate of the crew currency as against the System's
base currency. |
Crew Amount |
The amount
in the crew currency will be displayed based on the crew
exchange rate. |
Payment
Method |
Select
the method of payment of this allotment. |
Non-deductible |
Select this
check box to indicate that the voluntary allotment will
not
be deducted from the crew member's wages. |
Comments |
Include
any comments, if any. |
Bank
tab: The bank details will be automatically
retrieved from the crew's profile record. You can edit
these details as required. |
Miscellaneous
tab: Here you can track payment dates and even
the cheque number of the payment. |
Auto
Deduction |
If
an auto
deduction allotment is made, then the figure that
was automatically deducted for the crew member will be
displayed in this field. You can click the Lookup function
to view the Auto Deduction
Details. |
Manual
Deduction |
If
a manual
deduction for allotments was made, you can click
the Lookup function in this field to view the Manual
Deduction Details. |
Batch
ID |
The
batch ID that this allotment belongs to. |
Payment
Date |
Use
the calendar function to select the date the payment was
made. |
Cheque
No. |
Enter
the cheque number of the payment. |
AL
Posting Date |
Use
the calendar function to select the date this transaction
was posted to accounts in the Accounting System. |
Wage
Deduct Month |
Enter
the month the wage was deducted for this allotment. |
History
Transaction |
Click
this button to view the transaction history of allotments
made. You may then select a particular record and click
Import Allotment
to overwrite a current record, if required. |
Attachments
(Paper clip icon) |
Click in
this column to display the Upload
Manager pop-up window. Using this upload tool,
you can upload and attach relevant documents to this record,
for example, a soft-copy of the crew member's time sheet
etc.
You
can also click the Add
URL button to insert relevant or important links.
|
5. Click Save
to save your entries.
|
 What
would you like to do?
![]() Jump
to topic:
Jump
to topic:![]() What
would you like to do?
What
would you like to do?