|
Creating a Travel Request for Personnel |
New Travel Requests can be initiated from the Crew List, Activity or Planned Crew Change screens. This is the first step in making a confirmed travel booking for the selected personnel.
From the Activity screen, you can create a travel request for a single crew member signing on or signing off. You can make a travel request when creating a new activity for the crew member OR by using the Travel Request link for an existing activity.
From the Planned Crew Change and Crew Lists screens, you can create travel requests for multiple crew members at one go.
Notes:
Important Note: You would use the Travel Request feature if you will be utilizing a Travel Agent for the travel booking. However, if you are managing the travel booking by yourself i.e. without using a Travel Agent, you would need to use the Travel Details feature instead.
![]() Jump to topic:
Jump to topic:
Create a Travel Request for a Crew Member When Creating a New Activity
Create a Travel Request for a Crew Member from an Existing Activity
Creating a Travel Request for a Crew Member When Creating a New Activity
Screen Navigation: Personnel - Profiles - Activity tab
|
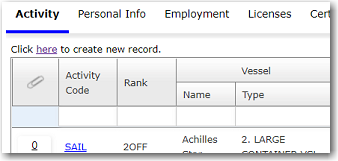
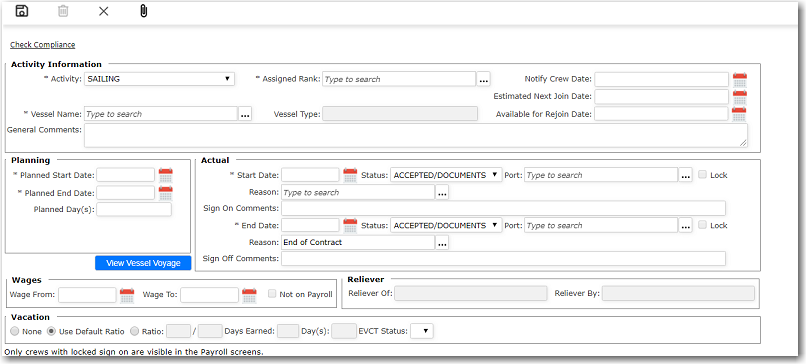
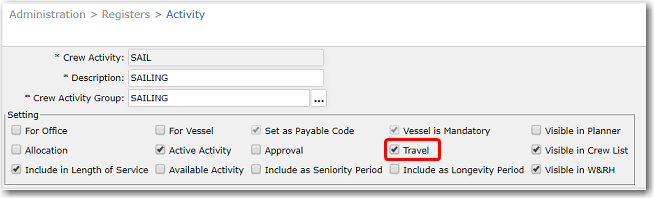
To create a travel request for a crew member when creating a new activity: 1. From the HR Manager main menu, click Profiles under the Personnel menu. 2. Ensure that the crew profile for which you want to create a travel request has been loaded. Use the Personnel search field to search and select the relevant crew profile OR use the Personnel List feature to load a previously saved list of crew and then select the crew member from this list. Then click a record from the Search Results section to view the profile. 3. After you have loaded the crew profile record, click the Activity tab. Note: You can only create travel requests when creating new activities for activities that have the Travel check box selected in the Activity Register. 4. Click the 'Click here to create new record' link to create a new activity record. On the Activity screen, enter information in the following fields:
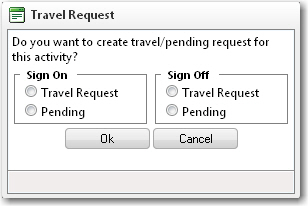
5. Click Save after you have completed your entries. 6. A Travel Request pop-up window will then appear asking you if you want to create travel requests/pending travel requests for the activity. Select the relevant radio buttons to make the travel requests and click OK. 7. The travel request that you have just created will now be available on the Requests screen in the Travel module (Travel - Requests). Proceed to the Requests screen in the Travel module and, under the Travel Request tab, click the travel request record that you just created. The Travel Request screen will then be displayed. Proceed to the Update a Travel Request topic to insert/edit the details of the travel request.
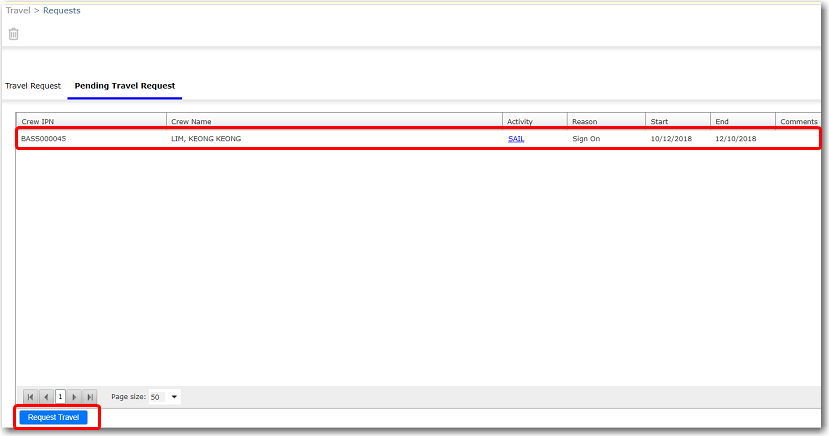
Note: If you have created a pending travel request (a travel request for future travel), the record will be listed under the Pending Travel Request tab on the Requests screen. You can turn this record into a travel request by highlighting it and then selecting the Request Travel button.
|
||||||||||||||||||||||||||||||||||||||||||||||||||||||||||||||||||
Creating a Travel Request for a Crew Member from an Existing Activity
Screen Navigation: Personnel - Profiles - Activity - Travel link - Sign On/Sign Off
|
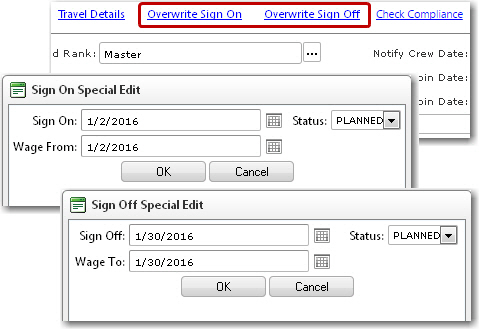
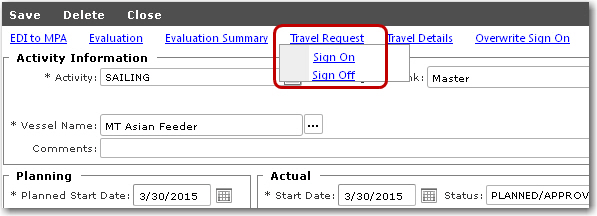
To create a travel request for a crew member: 1. From the HR Manager main menu, click Profiles under the Personnel menu. 2. Ensure that the crew profile for which you want to create a travel request has been loaded. Use the Personnel search field to search and select the relevant crew profile OR use the Personnel List feature to load a previously saved list of crew and then select the crew member from this list. Then click a record from the Search Results section to view the profile. 3. After you have loaded the crew profile record, click the Activity tab. A list of Activities created for the selected crew member will be displayed. Select an activity for which you want to create a travel request. Note: You can only create travel requests for activities that have the Travel check box selected in the Activity Register. 4. The details of the selected activity will be displayed on the Activity screen. Hover your mouse over the Travel Request link and select either Sign On or Sign Off (depending on whether you are creating a travel request for a crew member signing on or signing off). 5. The Travel Request screen will then be displayed. Proceed to the Update a Travel Request topic to insert/edit the details of the travel request.
|
Creating a Travel Request from the Crew Lists screen
Screen Navigation: Personnel - Crew Lists - Request Travel
|
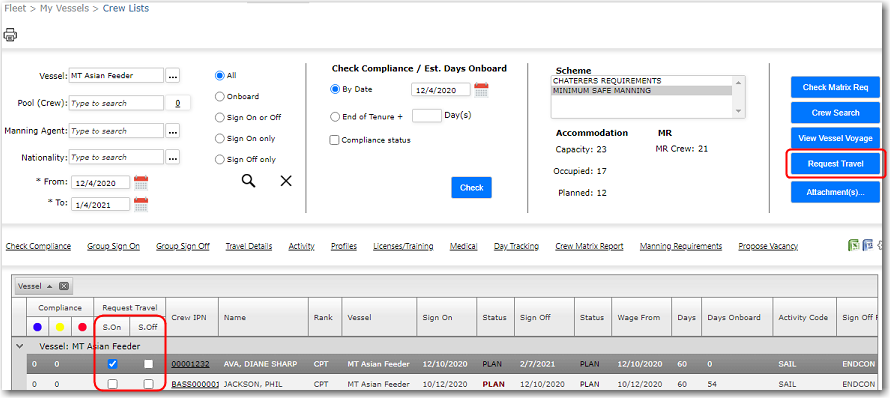
To create a travel request for a crew member: 1. From the HR Manager main menu, click Crew Lists under the Personnel menu. 2. Here you can carry out a search for a list of crew onboard a specific vessel and narrow this search based on a specific time period.
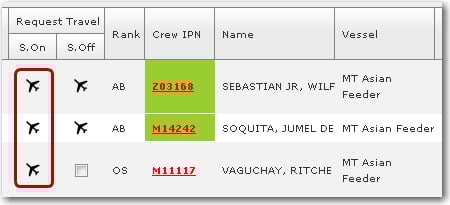
3. Click Search to retrieve a list of crew based on the criteria you have specified. 4. After you have generated the list of crew, select the check box under the Request Travel - Sign On/Off column for the crew that is to travel, and click Request Travel to create a new travel request. Multiple crew can be selected to include in the travel request. 5. A Request Travel pop-up screen will appear. Either select Create New Travel Request or Add to existing Travel Request. 6. If the Add to existing Travel Request option was selected, a Travel Request Number screen will pop up. Select a Travel Request record, and click OK. 7. The Travel Request screen will then be displayed. Proceed to the Update a Travel Request topic to insert/edit the details of the travel request. Note: Once a travel request has been created for a crew member, a flight icon will appear in the S.On and/or S.Off sub-column (depending on whether you have created a travel request for a crew member who is signing on or signing off).
|
Creating a Travel Request from the Planned Crew Change screen
Screen Navigation: Planning - Planned Crew Change - Request Travel
|
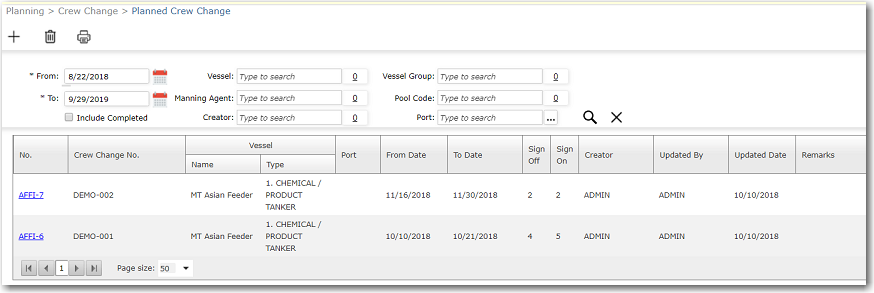
To create a travel request for a crew member: 1. From the HR Manager main menu, click Planned Crew Change under the Planning menu. 2. The Planned Crew Change screen will be displayed. To view planned crew records that are available in the System, specify the date range, Vessel, Port, Creator and so on and click the Search icon. The result will then be displayed. Note: Selecting the 'Include Completed' check box will include confirmed crew changes in your search result. 3. Click on the No. of a crew change record that contains the off-signers and on-signers for whom you want to create a travel request. The System will then display the details of the planned crew change and the off-signers and on-signers as planned in the Activity sub module (only crew members with confirmed sign-ons in their Activity records will be displayed in the Off-Signers column). 4. In the Off-Signer or On-Signer sections below, select the check box of the crew for whom you wish to create a travel request, then click Request Travel. 5. A Request Travel pop-up screen will appear. Either select Create New Travel Request or Add to existing Travel Request. 6. If the Add to existing Travel Request option was selected, a Travel Request Number screen will pop up. Select a Travel Request record, and click OK. 7. Proceed to the Requests screen in the Travel module and, under the Travel Request tab, click the travel request record that you just created. Proceed to the Update a Travel Request topic to insert/edit the details of the travel request.
|
![]() What would you like to do?
What would you like to do?