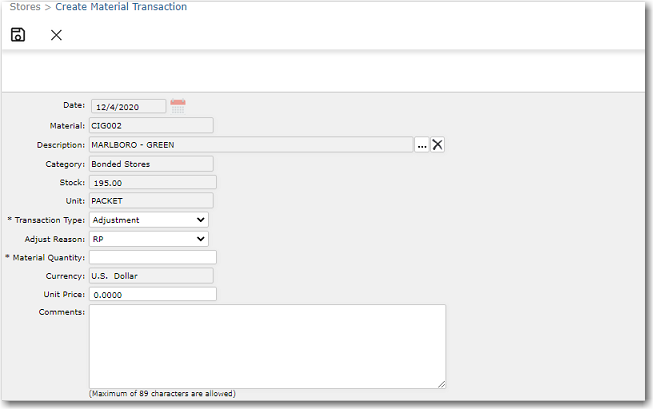
To create provision or bonded stores transactions:
1. From the HR Manager main menu, click Transactions under the Stores menu.
2. The Transactions screen is displayed.
3. In the Vessel search field, enter the name of the Vessel for which you want to create transaction records. Start entering a portion of the name and a list of suggestions matching your entry will be displayed. Select the required Vessel.
4. By default, the Bonded Stores transaction details for the selected Vessel will be displayed. Use the Category drop down list to switch between Provisions and Bonded Stores as required.

5. To create a new transaction detail, first select an item for which you want to create transaction details and then click New. (This feature is only available for users working on the Vessel database).
6. The Create Material Transaction screen will be displayed where you can enter the various details regarding a transaction that has been carried out for the selected item:

Field |
Description |
Date |
Select the date the transaction was carried out. |
Material |
The material ID of the item. |
Description |
The name/description of the item. |
Category |
Denotes whether this is a Provisions or Bonded Stores item. |
Currency |
The currency in which all pricing information is stored. |
Stock |
The current stock available for this item. |
Unit |
The unit of measurement for this item. |
Transaction Type |
Use the drop-down function to select the transaction type of the item. |
Material Quantity |
Enter the quantity of the item for this transaction. If you are performing a stock correction, then enter the correct stock quantity. |
Unit Price |
The price of the item per unit. |
Comments |
Enter any comments pertaining to this material transaction. |
7. Click Save to save the material transaction record.
Note: To further correct the stock quantity after you have saved your transaction record, you can do so by using the Inventory screen.