To enter details of the material received:
1. From the HR Manager main menu, click Material Receipt under the Stores module.
2. The Material Receipt screen is displayed.
3. In the Vessel search field, enter the name of the Vessel for which you want to receive material stock items. Start entering a portion of the name and a list of suggestions matching your entry will be displayed. Select the required Vessel.
4. The Material Receipt details for the selected Vessel will be displayed.
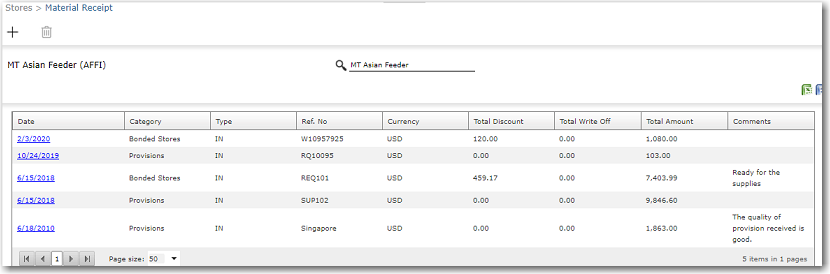
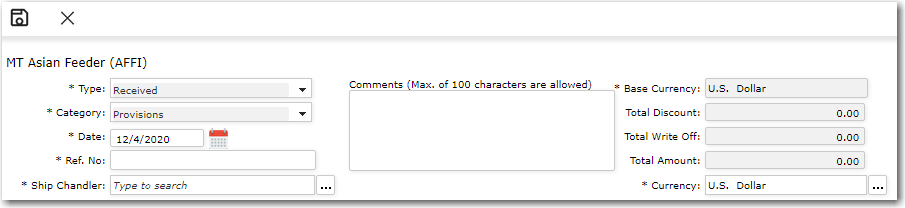
5. Click New and the following screen will be displayed where you can enter the required information:
Field |
Description |
Type |
Select the action type from the drop down list, for example, 'Received'. |
Category |
Select whether you are receiving Provision stock or Bonded Stores stock. |
Date |
Select the date the stock was received. |
Ref. No. |
Enter the reference number of this transaction. |
Ship Chandler |
Select the Ship Chandler who supplied the material. |
Comments |
Enables you to enter comments, if any, pertaining to the receipt of stock.
Note: A back-end configuration is available to automatically enter default comments (as set in the config). |
Base Currency |
Displays the base currency of the transaction. |
Total Discount |
Displays the total discount given by the supplier for the purchase of this stock. |
Total Write Off |
Display any amount that was written off. For instance, items that were set aside or discarded e.g. expired materials |
Total Amount |
Displays the total cost of the stock. |
Currency |
Select the currency used in the transaction. |
6. Click the '+' icon at the bottom left of the table and the Material pop-up window will be displayed where you can select the item that was received.
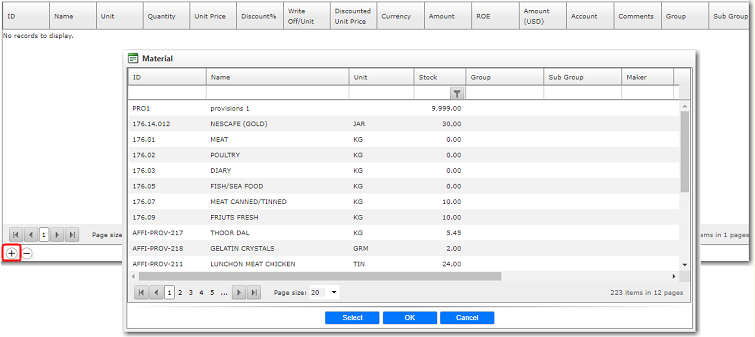
7. After you have made your selection, the item will then be displayed in the table on the screen. Click the ID link of the item to display its details' screen and enter the required information:
Field |
Description |
ID |
Use the Lookup function to display the Material lookup list from which you can select the exact stock item that you are creating a stock receipt note for. |
Name |
The name of the item will be automatically populated based on the Material ID selected. |
Unit |
The unit of measurement for the selected item will be automatically displayed. This is the UOM you have specified when creating this item in the Provision/Bonded Stock Register. |
Quantity |
Enter the quantity of the item that you are receiving. |
Unit Price |
Enter the unit price of the item that was charged for this purchase. The system will validate to ensure that the unit price is greater than 0. |
Discount % |
Enter the percentage of discount given by the Supplier, if any. |
Write Off |
Enter if any amount was written-off. For instance, items that were set aside or discarded e.g. expired materials. |
Discounted Unit Price |
The discounted unit price will be automatically calculated and displayed by the System based on the discount percentage entered in the Discount % field. |
Currency |
Use the Lookup function to select the currency of the item's price. |
Amount |
The amount in the currency charge will be displayed. |
ROE |
The rate of exchange will be automatically displayed by the System based on the Currency selected. |
Amount (in base currency) |
The amount in the System's base currency will be automatically calculated based on the rate of exchange. |
Account |
If an account has been tied to this stock item in the Provision and Bonded Stores Register, then the account number will be displayed here. |
Comments |
Enter any comments, if any, regarding the receipt of this stock item. |
Group |
The group that this stock item falls under will be displayed based on the grouping selected in the Provision and Bonded Stores Register. |
Sub Group |
The sub group that this stock item falls under will be displayed based on the grouping selected in the Provision and Bonded Stores Register. |
8. Click Save after you have completed your entries.
Note: Click the ID link of a record to display its details section and then click Delete to remove the record from the table. Alternatively you can also highlight a record in the table and click the '-' icon to delete that record.
9. Click Save at the top of the screen to save your entries. You will now see your entries reflected in the main Materials Receipt screen.