To enter details of the crew member's beneficiary:
1. From the HR Manager main menu, click Profiles under the Personnel menu.
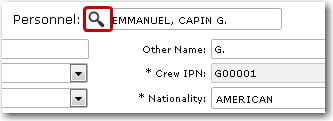
2. Ensure that the crew profile of which you want to create beneficiary details has been loaded. Use the Personnel search field to search and select the relevant crew profile.
Note: To use a previously saved list of crew, click the search icon in the Personnel search field to use the Personnel List feature on the Simple Search window. Use the drop-down function to select and load a list from the Personnel List section and click a crew member from the Search Result section to view his profile.
3. After you have loaded the crew profile record, click the Beneficiary sub tab under the Payroll tab.
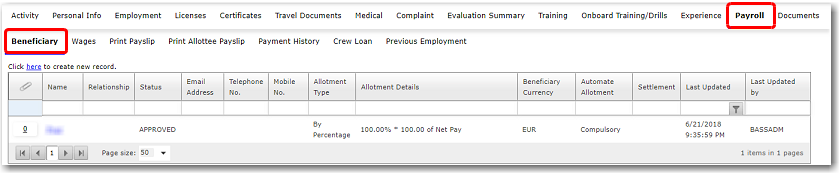
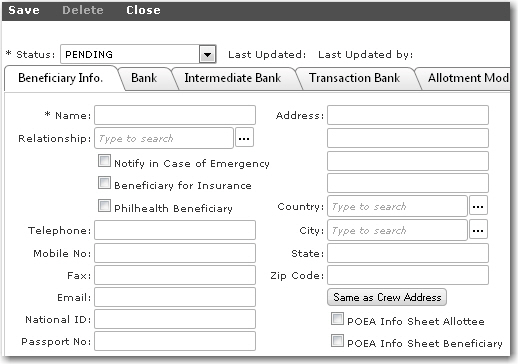
4. Click the 'Click here to create new record' link to create a new beneficiary record. On the Licenses/Training screen, ensure that you have the Beneficiary Info tab open. Select the Status of the record and enter information in the following fields:
Field |
Description |
Name |
Enter the name of the crew member's beneficiary |
Relationship |
Use the Lookup function to select the crew member's relationship to the beneficiary. |
Notify in case of Emergency |
Select this check box if this person is the crew member's 'in case of emergency' contact person. |
Beneficiary for Insurance |
Select this check box if this person is to be the crew member's insurance beneficiary. |
Philhealth Beneficiary |
Select this check box if this person is the crew member's Philhealth beneficiary. |
Telephone |
Enter the beneficiary's telephone number. |
Mobile No |
Enter the beneficiary's mobile phone number. |
Fax |
Enter the beneficiary's facsimile number. |
Enter the beneficiary's email address. |
|
National ID |
Enter the beneficiary's national identity card number. |
Passport No |
Enter the beneficiary's passport number. |
Address |
Enter the beneficiary's address. |
Country |
Use the Lookup function to select the beneficiary's country of residence. |
City |
Use the Lookup function to select the beneficiary's city of residence |
State |
Enter the state in which the beneficiary resides. |
Zip Code |
Enter the he zip code for the address. |
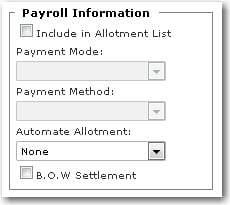
Payroll Information |
Select the respective check boxes that apply. Select the Include in Allotment List check box if allotment payments are to be made to this beneficiary. You may then select the Payment Mode i.e. either cash, telegraphic transfer or by cheque. If you select 'TT', then further specify the method of payment using the Payment Method field.
In the Automate Allotment field, select whether this is a compulsory allotment or a voluntary allotment.
Select the B.O.W. Settlement check box to indicate that the beneficiary is assigned as the primary receiver of the month-end Balance of Wages (B.O.W.) of the crew member.
|
POEA Info Sheet Allottee |
Select the check box to indicate that the beneficiary is assigned as the declared allottee as required by the Philippine Overseas Employment Administration (POEA). |
POEA Info Sheet Beneficiary |
Select the check box to indicate that the beneficiary is assigned as the declared beneficiary as required by the Philippine Overseas Employment Administration (POEA). |
Comments |
Enter comments, if any, relating to this beneficiary. |
Note: The Same as Crew Member button allows you to copy from the previously entered crew member address details under the Personal Info - Address sub tab.
5. Move on to the Bank tab to enter the beneficiary's bank details. For instance, enter the Bank Code, Swift Code, Account Number and so on.
6. Move on to the Intermediate Bank tab to enter details of any intermediate bank used.
7. Move on to the Transaction Bank tab to enter details of the company's transaction bank used.
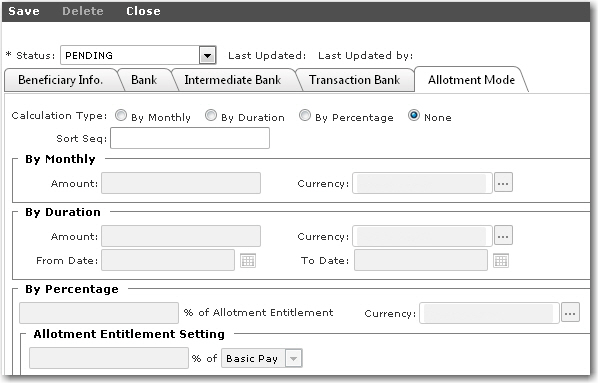
8. Move on to the Allotment Mode tab to enter the following information:
Field |
Description |
Calculation Type |
Specify the calculation mode for the allotment. Make your selection from either By Monthly, By Duration, By Percentage or select None if no allotments are to me made. |
Sort Seq |
You can indicate the sort sequence for each beneficiary. This enables you to prioritize the beneficiary payments according to their sequence numbers during the payroll calculation process. For instance, a Sort Seq of ‘1’ indicates that this beneficiary should be paid first before the rest. |
By Monthly |
If you select the By Monthly radio button, the By Monthly section will be activated for entry. Here specify the Amount and Currency of the monthly allotment. |
By Duration |
If you select the By Duration radio button, the By Duration section will be activated for entry. Here specify the Amount and Currency and the duration of the allotment. |
By Percentage |
If you select By Percentage, the By Percentage section will be enabled. Enter the allotment percentage in the Allotment Entitlement field based on the total eligible allotment percentage. In the Allotment Entitlement Setting section, enter the total percentage of the wage (either Basic Pay, Gross Pay or Net Pay) that is to be utilized for the allotment.
For example, if the Allotment Entitlement Setting is 40% of the Net Pay and the Allotment Entitlement for this beneficiary is 20%, this indicates that this beneficiary will receive 20% of the 40% (of the Net Pay) that has been set aside for the allotment.
In the Currency field, you can use the Lookup button to select the currency that is to be used for the allotment.
For automated allotment, you will need to select 'By Percentage' in order for the System to carry out automatic allotments. |
9. Click Save after you have completed your entries. The information entered will now be displayed in the Beneficiary table.